

The Pulls Email Notification is the weekly message telling each customer exactly what was pulled for them. Because it only goes to customers who had something come in, it's the rare email that's never a "nothing to report" — if a customer receives it, they have books waiting. That clean signal is why most shops send it the same day they finish checking in.
The reason the send is manual (rather than automatic on check-in) is simple: books arrive on different days, and Manage Comics doesn't know when your shop is fully done for the week. You trigger the send when you're ready.
Create the Pulls Email
Go to Customers → Email Campaigns.
Click New Campaign.
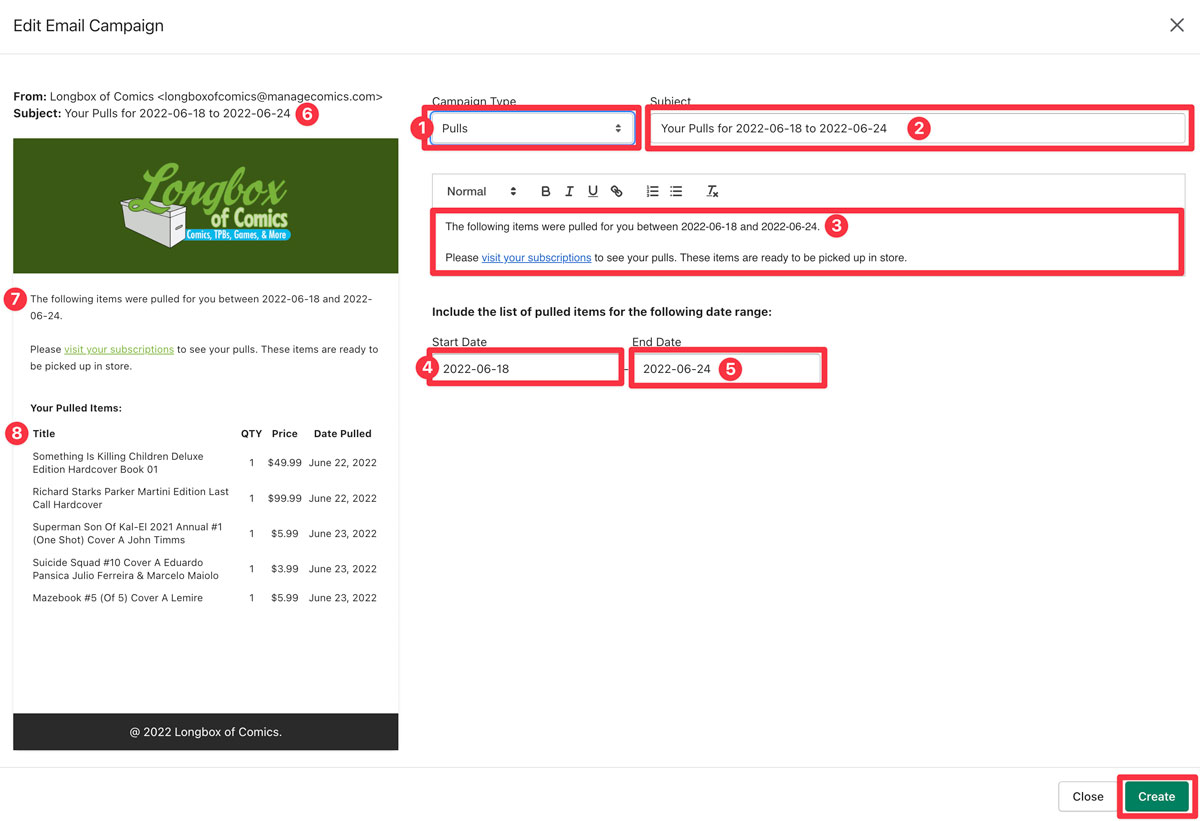
For Campaign Type, choose Pulls.
Choosing Pulls auto-populates:
Start Date — 7 days ago by default.
End Date — today by default.
Subject line — "Your pulls for [Start Date] to [End Date]".
Body — a default message using date variables:
The following items were pulled for you between [Start Date] and [End Date]. Please visit your subscriptions to see your pulls. These items are ready to be picked up in store.
You can edit any of this. The preview on the left of the editor shows what the email will look like.
Date Variables — How They Work
The [Start Date] and [End Date] placeholders are live variables. Wherever you include them in the subject or body, they're replaced with the actual dates when the email is sent.
What you write: Your pulls for [Start Date] to [End Date] What customers see: Your pulls for 2026-04-15 to 2026-04-22
Important: if you change the start/end date after writing the body, the variables auto-update everywhere. But if you manually typed the dates in (rather than using the variables), they won't. Stick with the variables unless you have a specific reason not to.
Send the Email
Click Create in the bottom right. You're taken back to the Email Campaigns screen.
Find your new draft campaign.
Click Send Now.
A confirmation popup shows the total number of subscribers in your database. This is a total, not a filter — the email itself will only go to subscribers with pulls in the date range.
Confirm to send.
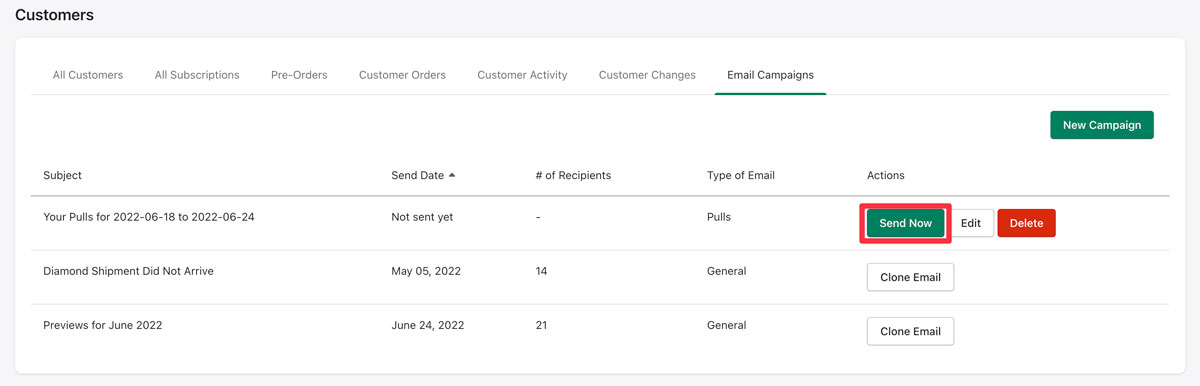
After sending, the Campaigns screen shows the number of recipients that actually received the email (not your total subscriber count) and the type of campaign.

Tips
Run this after you've finished all check-in for the week — typically end-of-day Wednesday for most shops.
If you had multiple invoices across the week (a Diamond shipment Wednesday, a late Lunar Thursday), wait until everything is checked in before sending.
The same system can send one-off General campaigns — see Email Campaigns.
Clone emails that you repeat frequently. Don't forget to adjust the pull date range.