

Weekly check-in is the defining workflow of Manage Comics. It is the process by which the books that showed up in your shop become the books in your inventory system, on your storefront or POS, on your shelf, and in your customers' pulls. Everything else — FOC, email campaigns, initial orders, reports — is there to support this one thing.
Because it touches inventory, customer records, and your external store, check-in is also where small habits matter most. Tag consistency, attention to shortages, and correctly flagging reprints are what separates a clean week from a messy one.
This brief video (just over 3 minutes long) will show you the entire process for pulling from an invoice.
Before You Start
You need your distributor invoice file(s). Diamond, Lunar, PRH, and Universal all provide CSV invoices through their retailer portals. If you don't know where to get them, see Where to Get Invoices for Importing.
If you have product but no invoice yet (common with late shipments), use New Mid-Week Shipment (No Invoice File) instead.
Step 1 — Start the Check-In
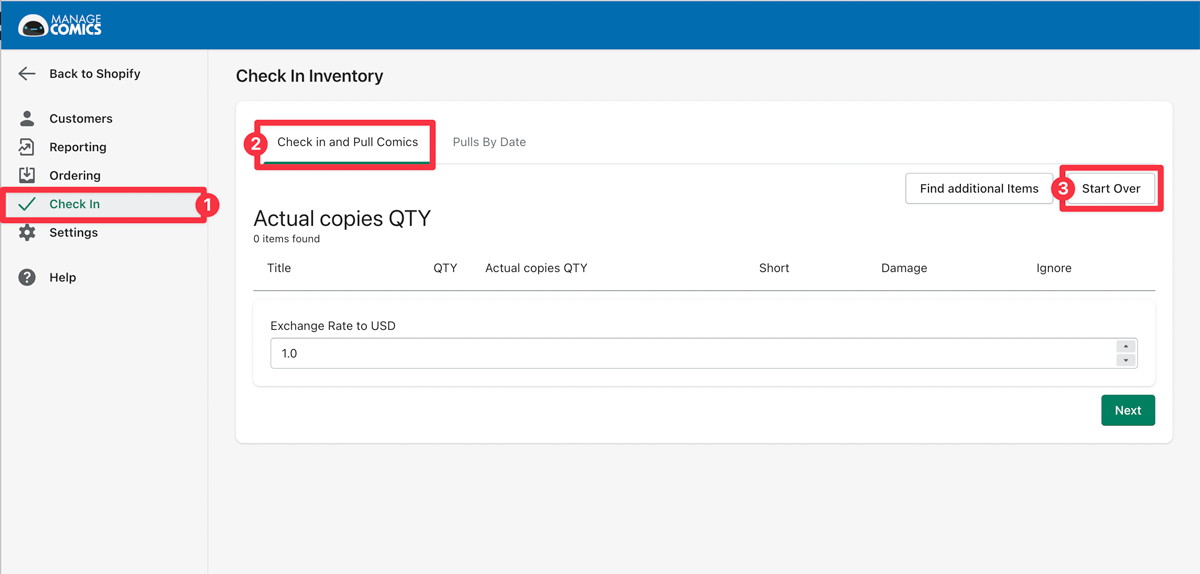
In the Manage Comics app, click Check-In.
You should land on Check-In and Pull Comics.
If the page shows leftover data from a previous session, click Start Over to clear it and get the upload panel.
Step 2 — Upload Your Invoices
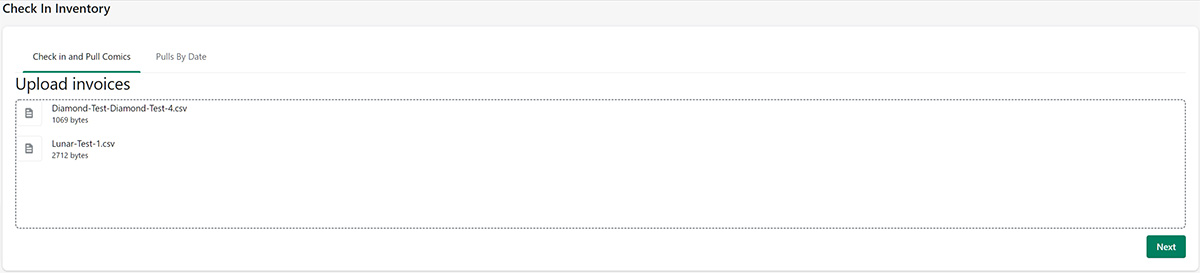
Drop the invoice file(s) into the upload box, or click Add Files. You can upload multiple invoices at once although we recommend uploading each invoice individually. Click Next when the files are loaded.
Step 3 — Review the Line Items
You now see every item on the invoice(s). For each line, you have three actions available:
Shortages — record items that shipped short.
Damages — mark damaged copies.
Ignore — skip items. Useful for removing items that already came in a mid-week shipment weeks ago and are now appearing on the invoice.
If extras arrived that aren't on the invoice, click (4.) Find Additional Items to add them manually (by title or barcode scan).
Click Next when finished.
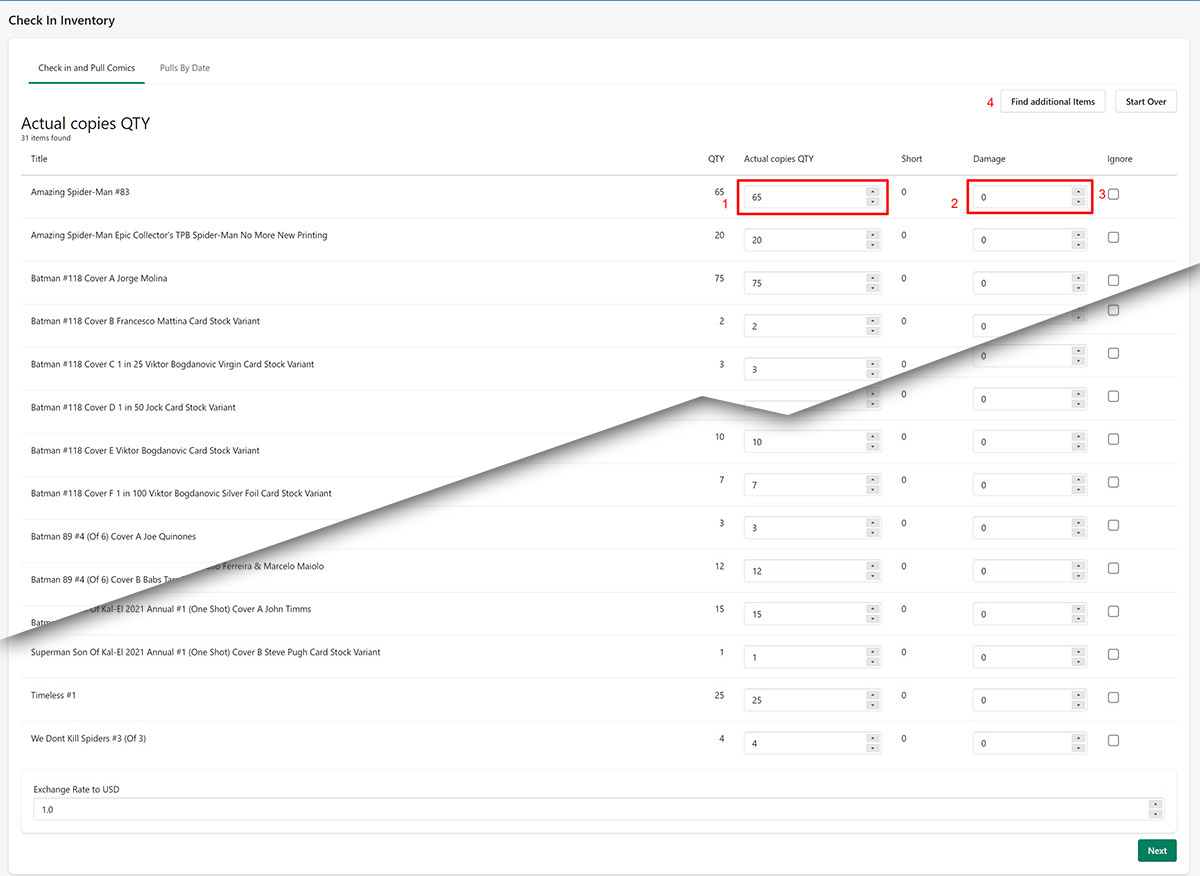
Shops outside the US: at this stage you can enter an exchange rate for the check-in. Manage Comics uses it to convert the distributor's USD prices into your local currency, updating both your customer pulls and your store stock with the converted price. Verify that your distributor prices are not in your local currency first.
Step 4 — Review Subscriber Allocation
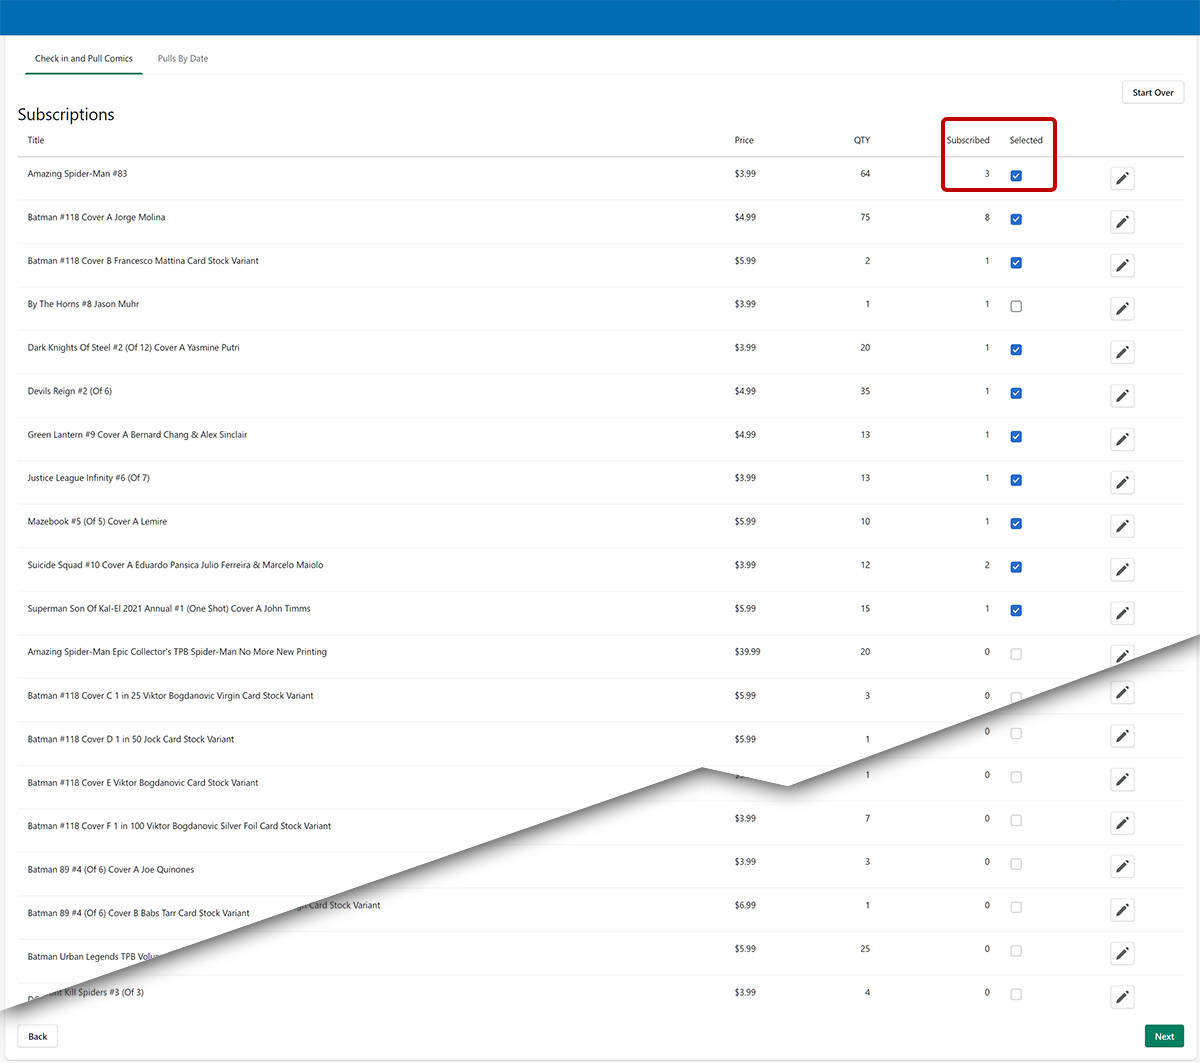
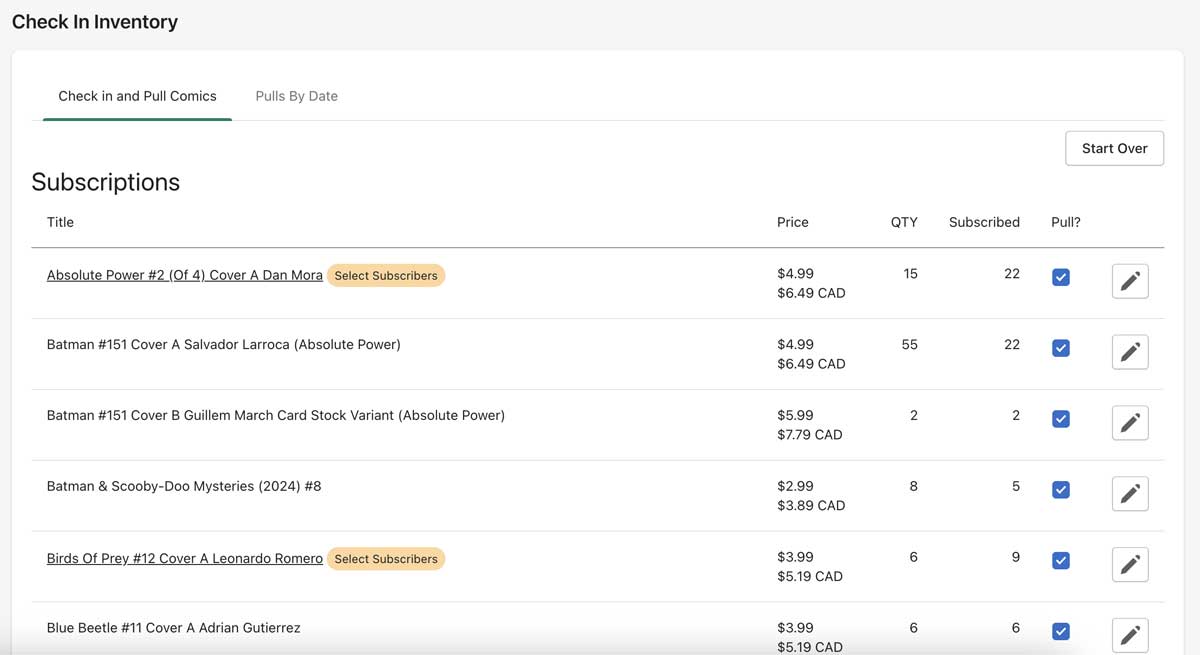
This screen shows, per title, how many subscribers you have. Titles with active subs are pre-checked.
Why a title might show 1 subscriber but be unchecked: that customer was subscribed at the title's FOC but has since unsubscribed. Manage Comics flags the case so you don't accidentally pull for someone who canceled.
Why you might want to uncheck a title manually:
Reprints. There is currently no reprint flag, so if you receive a reprint of an older issue, Manage Comics will try to pull it for every subscriber unless you uncheck the title.
Replacements for previous shortages. Same reason — you're not pulling for a new wave of customers.
Use the pencil icon at the end of each row to adjust the price of any title on the invoice.
Step 5 — Handle Shortages Among Subscribers
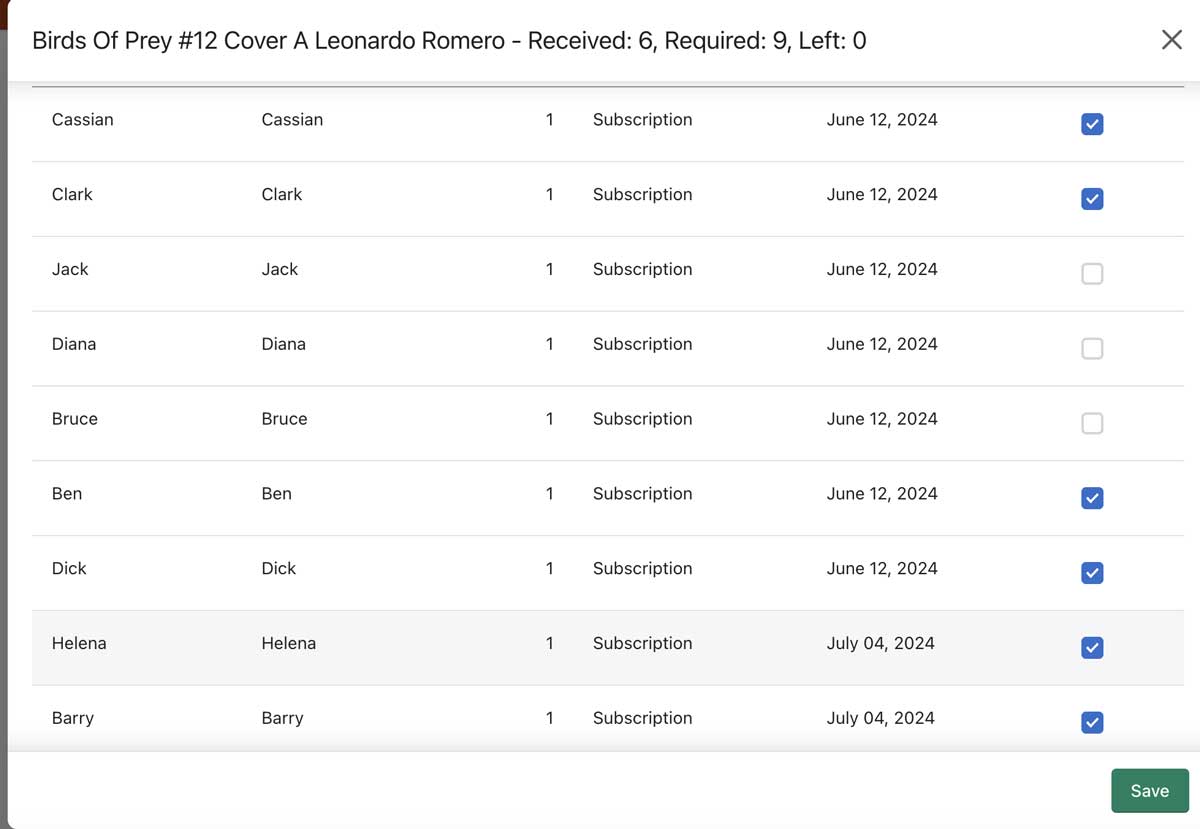
If you're short copies of a title with multiple subscribers, Manage Comics prompts you to Select Subscribers. By default, it fulfills in first-ordered-first-served order.
To reassign manually:
Click the title to open the subscriber list.
Uncheck the person you want to not receive a copy (this first — important).
Check the person who should receive it instead.
Manage Comics only allows as many check boxes as you have copies available; everyone else is greyed out.
Step 6 — Import Leftover Quantity to Your Store
For the copies beyond subscriber allocation, choose:
How many copies go to the storefront or POS.
Any tags — critical for Ordo shops using a Smart Collection for new releases. Forgetting the tag means the new release won't appear in the storefront collection.
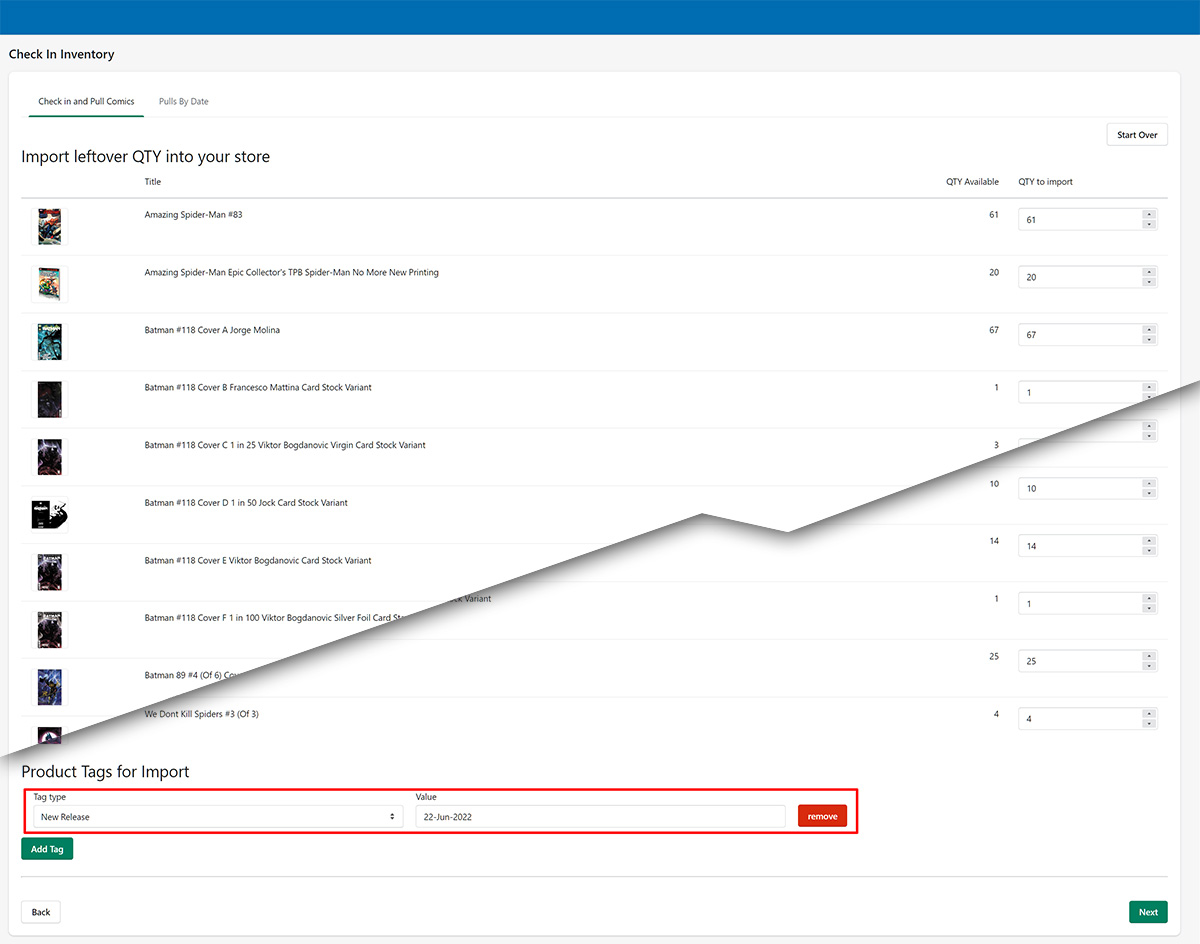
Ordo tip: the tag you use here must match what your New Releases Smart Collection is looking for. See Update New Releases Collection.
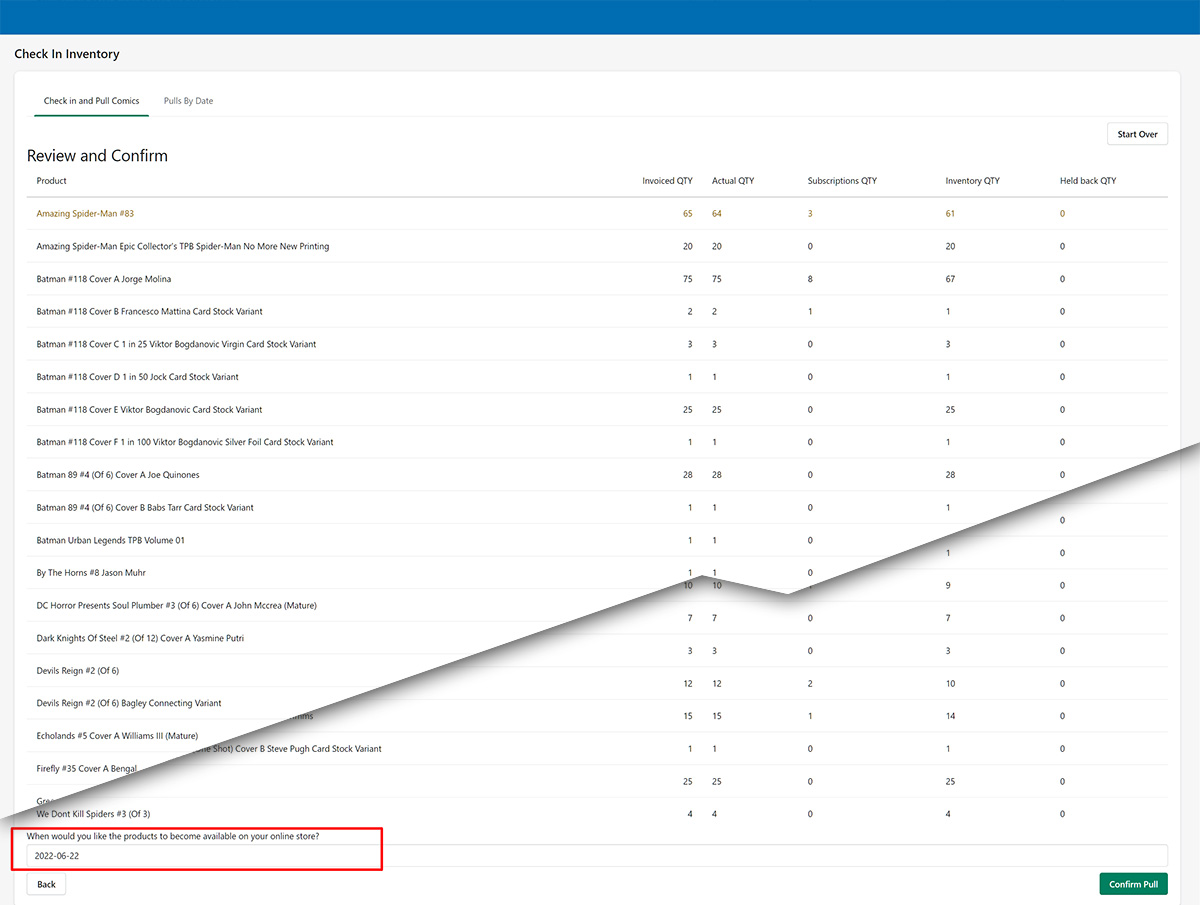
Step 7 — Final Review
Last chance to check everything. At the bottom, set the available-on-store date — defaults to today, but if you're checking in several days before street date, move it forward. When you're happy, click Confirm Pull.
Step 8 — Pull Summary
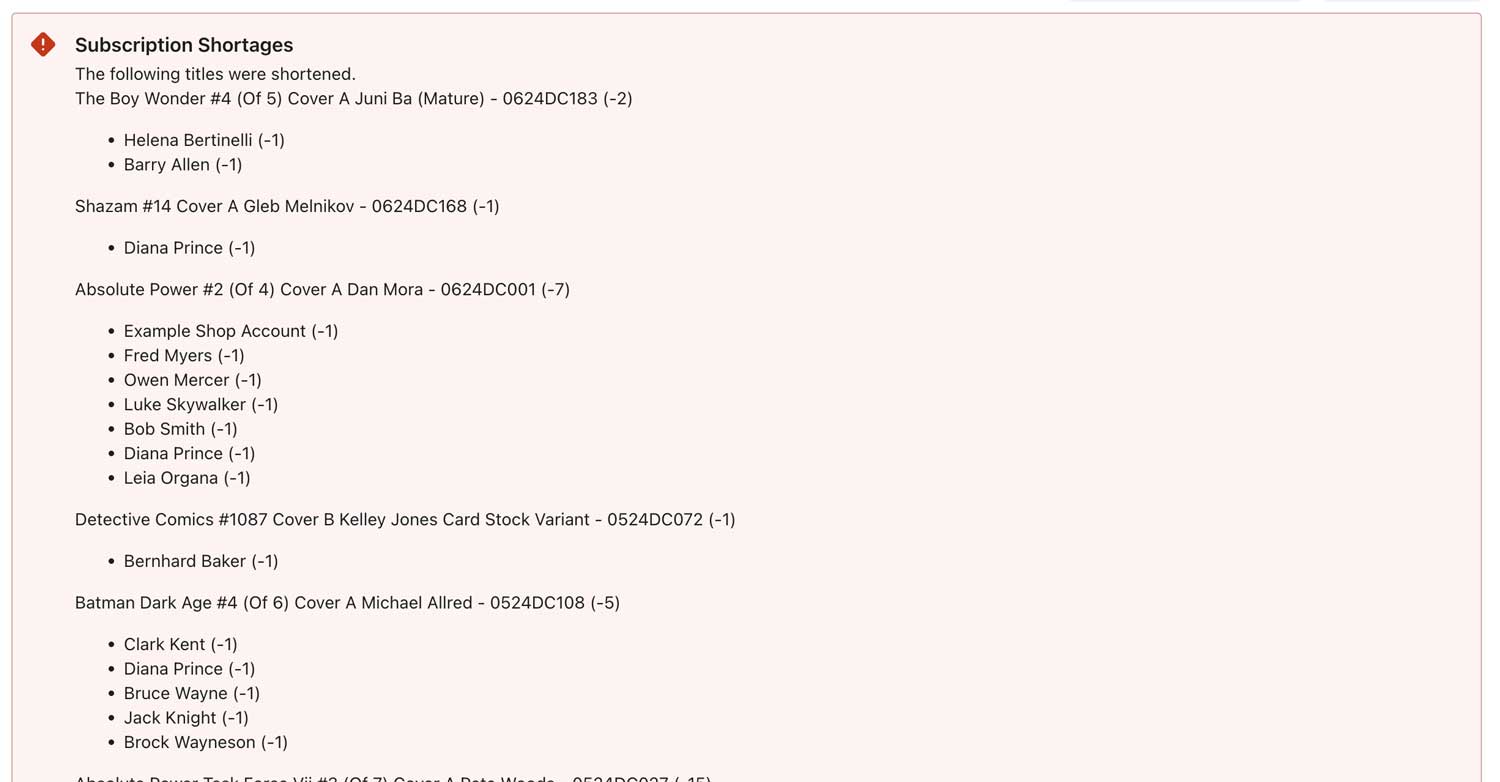
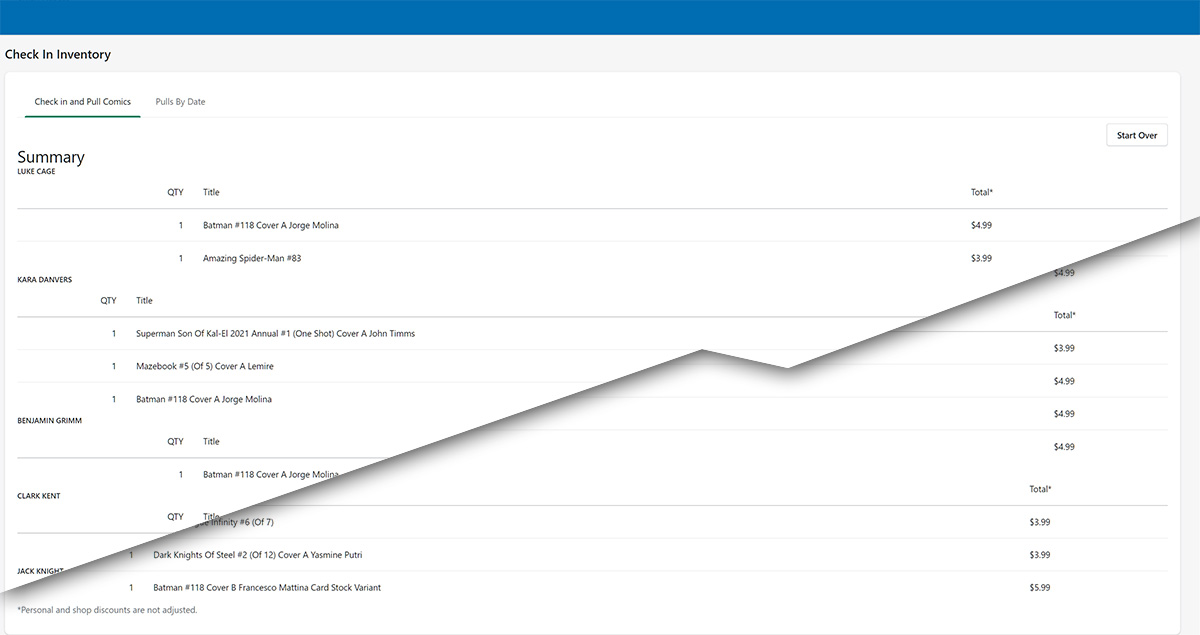
You land on a pull summary page showing what went to which customer. If there were shortages, they're listed in a warning at the top.
Step 9 — Pulls by Date
Click Pulls By Date to see and export the pull list:
Filter by date range (useful for shops that process multiple invoices across the week).
Sort by First Name, Last Name, Subscriber ID, or Title.
Export as CSV for your records.
You can return here any time — this view is permanent, not session-based.
Ordo-Specific Warning
Shopify creates each product in the invoice, then updates every item's cost, then updates quantity. This whole process can take up to 15 minutes for a large invoice. Depending on when you check the Shopify Products page, items may show zero quantity or not appear at all. Wait before troubleshooting — it's almost always the sync still catching up.
After Check-In
Physically pull the books (if you haven't already been pulling while checking in).
Invoice customer orders if you collect payment online.
Put out your shelf copies.
Ordo: update your New Releases collection if you haven't already.