

Before You Start
Every Manage Comics customer needs an email address. It's the primary identifier — it's how Manage Comics connects a customer record to their Shopify account (Ordo), their pull list, and any imports.
If a customer genuinely doesn't have an email address, create a placeholder: firstname.lastname@yourstorename.com. This is a known pattern and everything downstream still works.
Phone numbers, if provided, must be 10 digits and unique across your customer base. Duplicates cause import and sync failures.
Creating a new customer is a two-step process: create the customer record, then attach their subscriptions or pre-orders. The workflow is fast once you've done it a few times.
Adding a Customer — Ordo (Shopify)
In the Shopify admin, go to Customers.
Click Add customer in the top right.
Fill in at minimum: first name, last name, email address.
Add phone, address, and notes as needed.
Click Save.
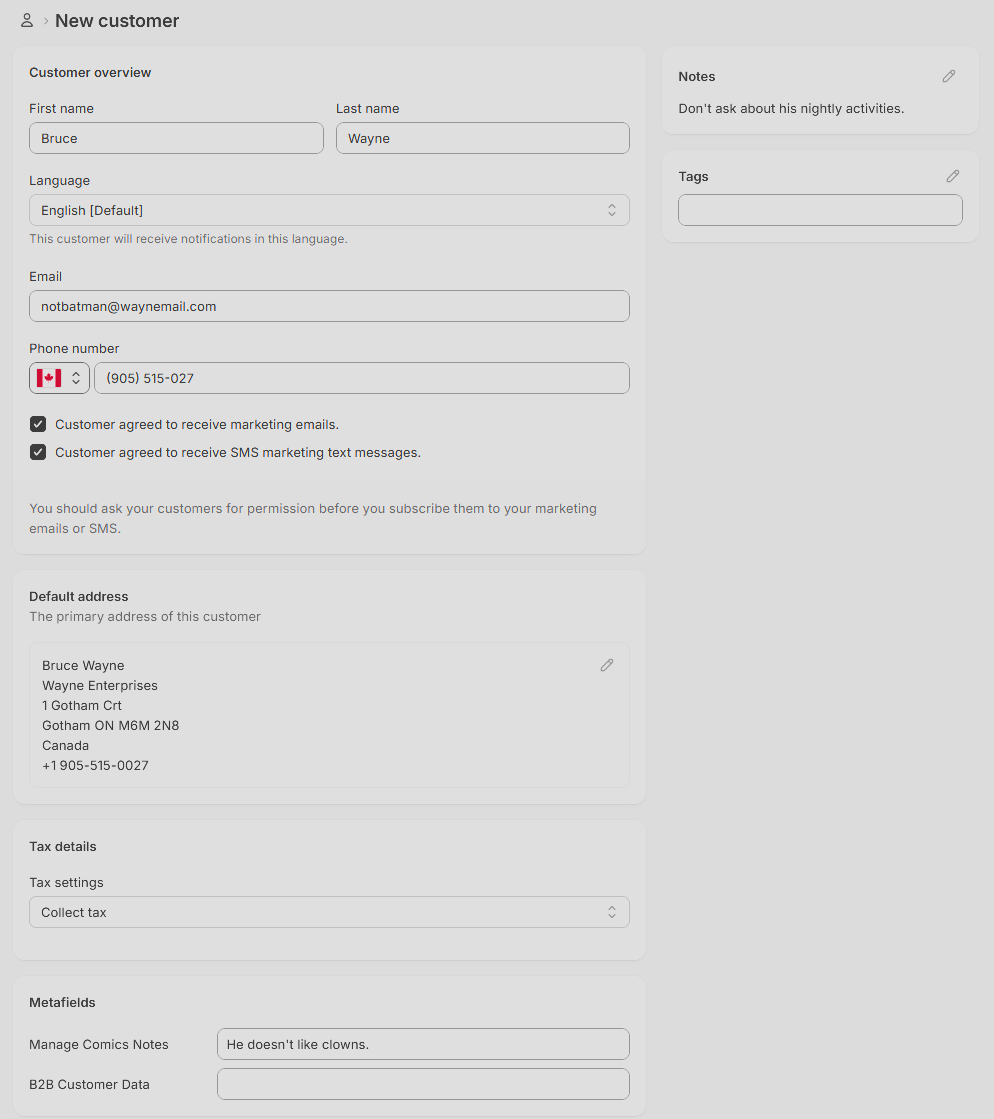
The customer now exists in Shopify. Manage Comics will pick them up automatically on its next sync.
Open the Manage Comics app (Apps → Manage Comics).
Go to Customers, select All in the dropdown and search for the customer you just created. They'll appear in the list.
Alternatively, click Add Subscription for New Customer and search
Click their name to open their detail view. From here, you can add subscriptions, pre-orders, notes, and pull preferences.
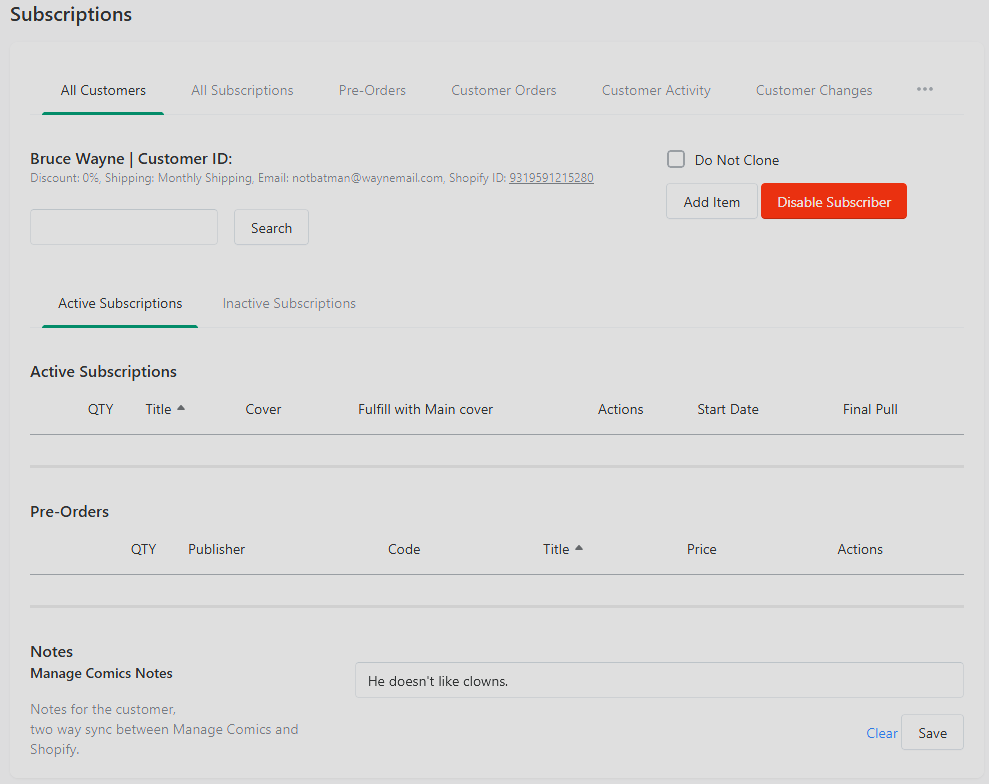
If the customer doesn't appear in Manage Comics within a minute or two, try reloading the Manage Comics app. Shopify customer sync is near-real-time but not always instant.
Adding a Customer — Oryx
Log in to Oryx.
Go to Customers in the left nav.
Click Create New Customer in the top right of the customer list.
Fill in first name, last name, email address (required), and phone number (optional, must be 10 digits and unique).
Optionally add address, store notes, and any customer flags (tax-exempt, etc.).
If you're a multi-location shop, select the home location for this customer.
Click Save.
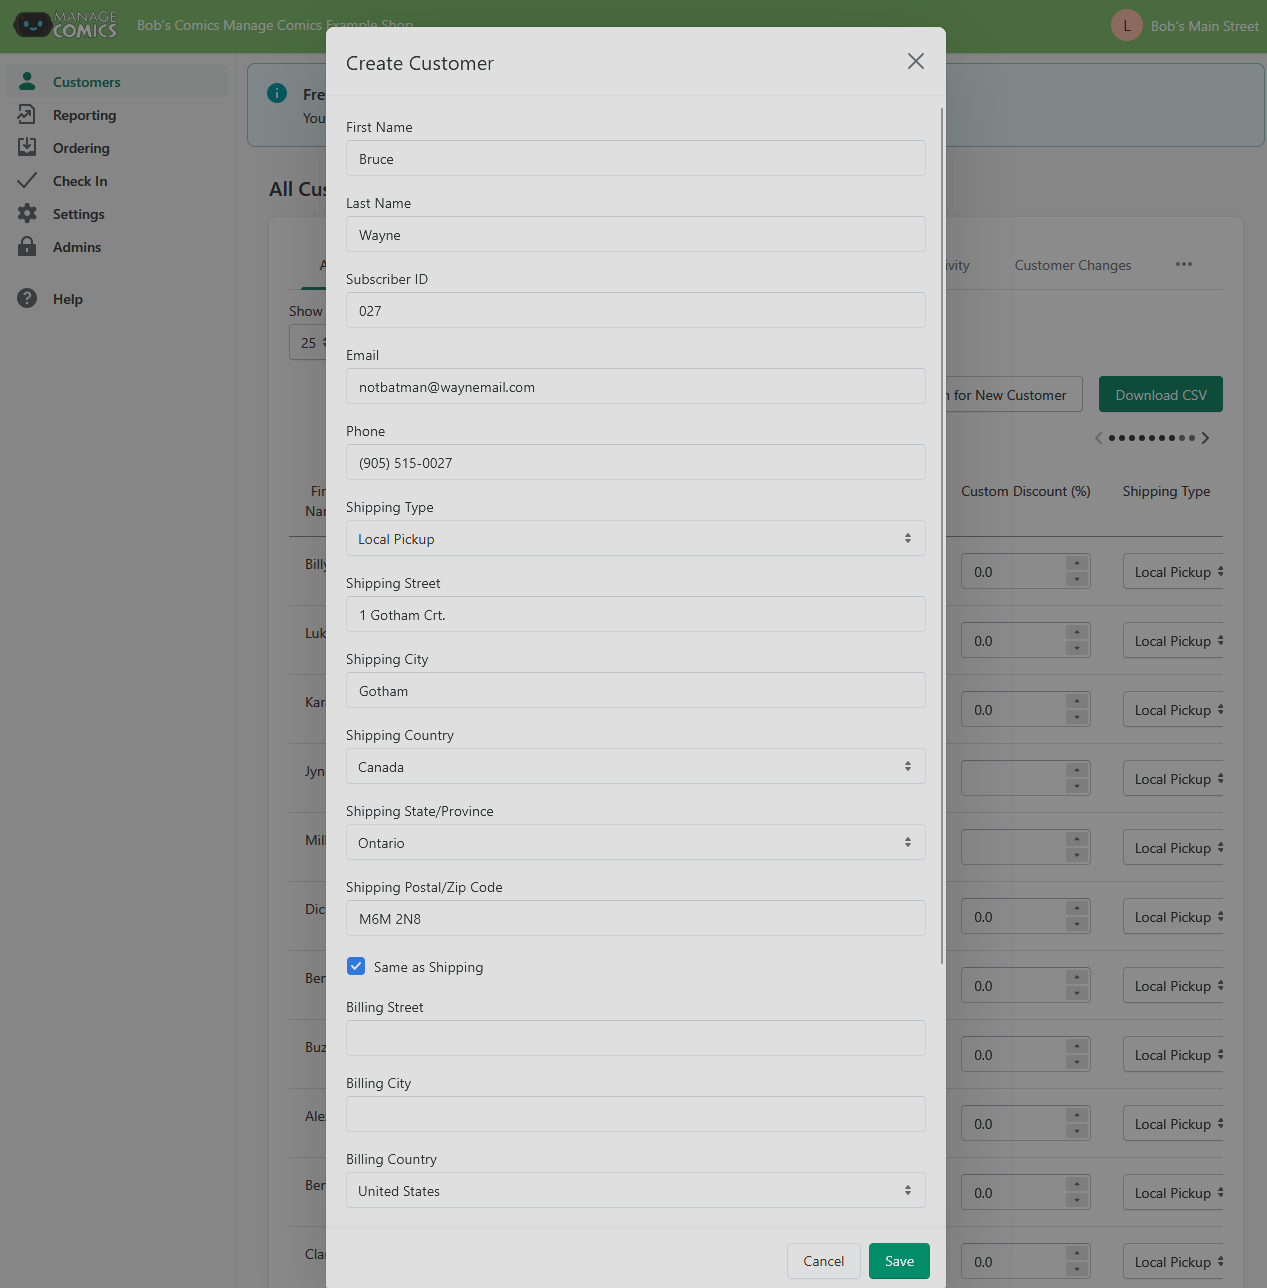
The customer is now in Oryx. From their detail view, you can add subscriptions, pre-orders, and notes.
Attaching Subscriptions to the New Customer
Once the customer exists, add their pull list:
From the customer's detail page, find the Subscriptions section.
Click Add Item.
Search for the series by title or by Distributor code.
Select the series, set the quantity, and optionally set a cover variant preference.
Save.
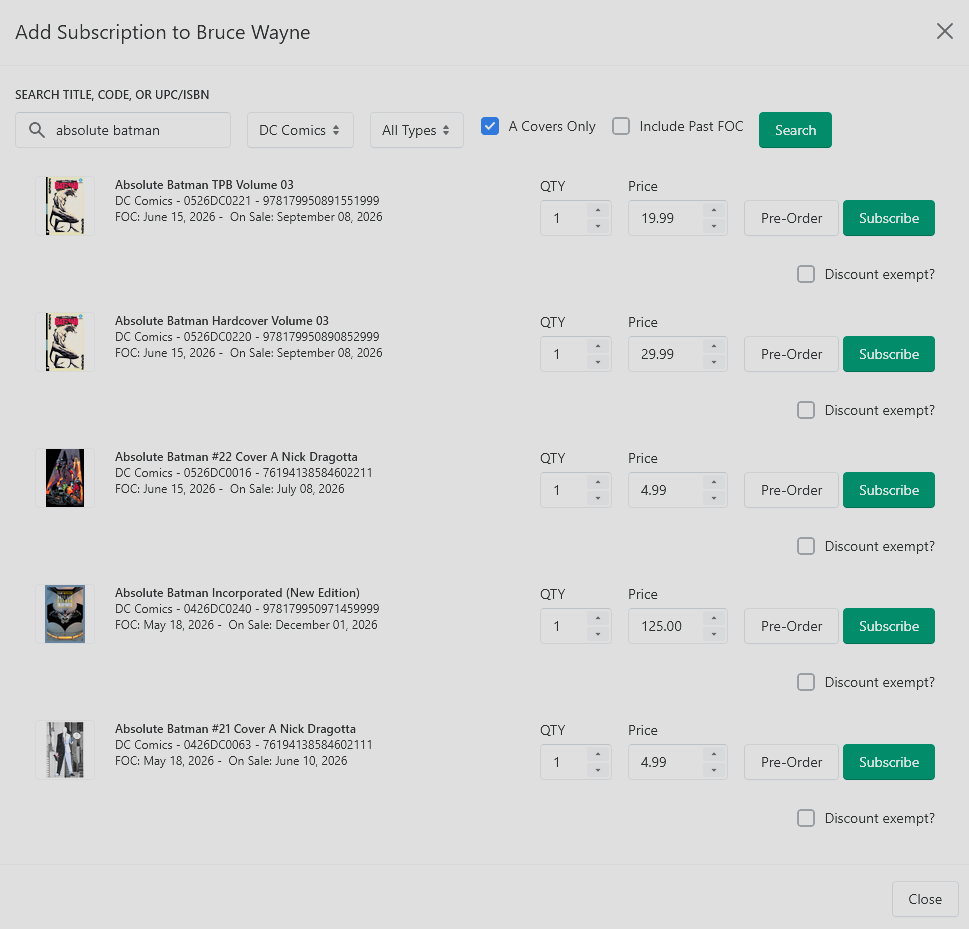
Repeat for each series on the customer's pull list. If the customer has a long list and you're migrating them from a paper or spreadsheet-based system, consider using the subscription CSV import instead — see How to Import into Manage Comics .
After You've Added the Customer
If this customer should receive FOC reminder emails or weekly pull-list emails, make sure they're tagged correctly. Defaults usually work, but high-value customers sometimes warrant custom email settings.
If this is a pre-order customer, their pre-orders are added from the same detail page under the Pre-Orders section.
Verify the customer appears in the appropriate Customer List (e.g., "Active Subscribers") so they're included in your weekly workflows.
Common Issues
"This email is already in use." The customer already has a record — search for them and edit the existing record instead of creating a duplicate. Shopify (Ordo) and Oryx both enforce email uniqueness.
"Invalid phone number." Phone must be exactly 10 digits, no formatting.
(555) 123-4567won't be accepted — use5551234567.Customer saved but doesn't show subscriptions. Subscriptions are a separate step. Add them from the customer detail page after the customer record itself is saved.