

This article will walk you through all of the available settings in the Locations tab, as well as show you the steps to upgrade your subscription for multi-store and how to add additional locations.
Manage Locations
Under Manage Locations you will see the total number of locations that are included in your subscription.
You can update your Default Location in this section or under General Settings.
For more information about enabling Multi-Store Locations, click here.
ORDO/Shopify
Adding Additional Locations
You can update your subscription to add additional locations under the Manage Locations section.
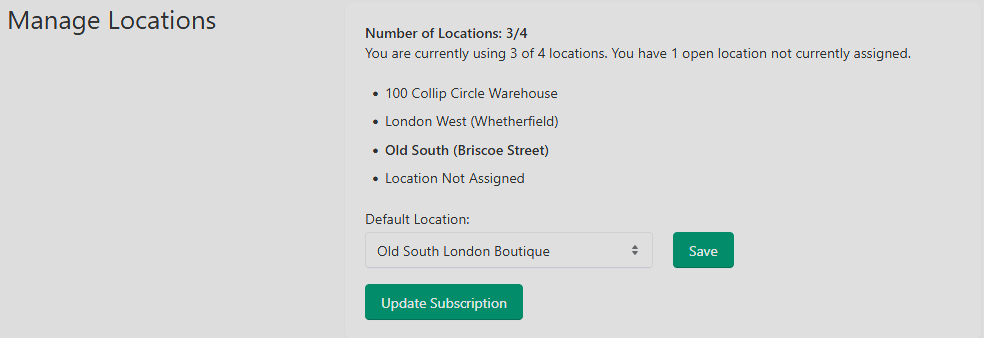
If you want to update your subscription, click "Update Subscription" and you will be prompted to add new locations or remove inactive ones.
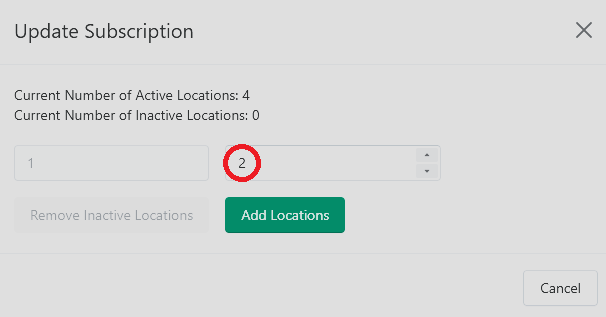
Select the number of locations you want to add and you will be redirected to Shopify's billing page, where you can approve new billing that reflects the total number of locations. In the above example, we started with 4 Active Locations and want to add 2 additional stores.
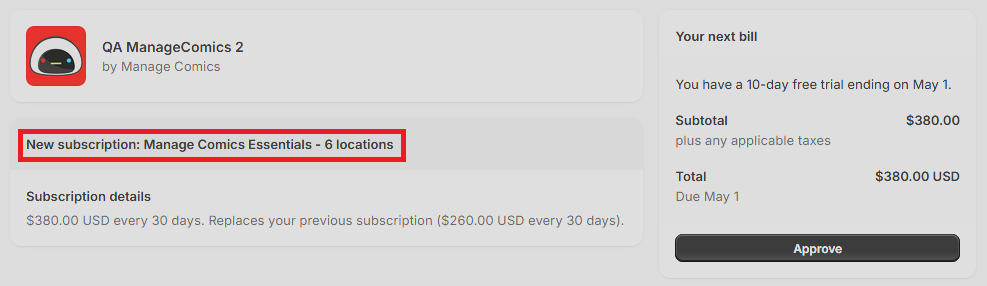
The monthly billing will now reflect 6 total stores.
Additional Location Names and Settings
To enable multi-store locations, first you have to create a new location in Shopify.
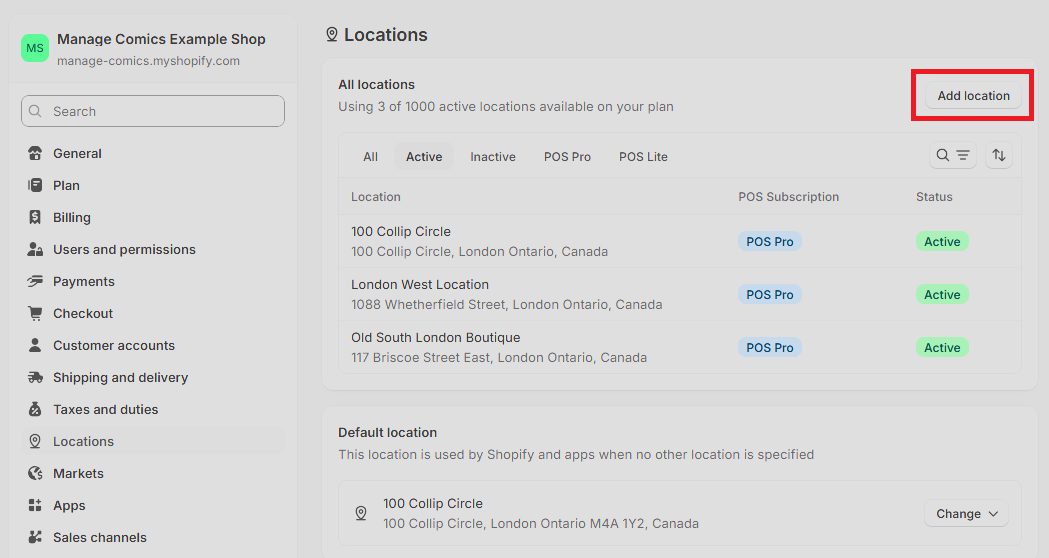
Step 1.1: Navigate to Shopify Settings > Locations
Here you can see all of your Shopify locations and the active locations available based on your Shopify plan. Click Add Location.
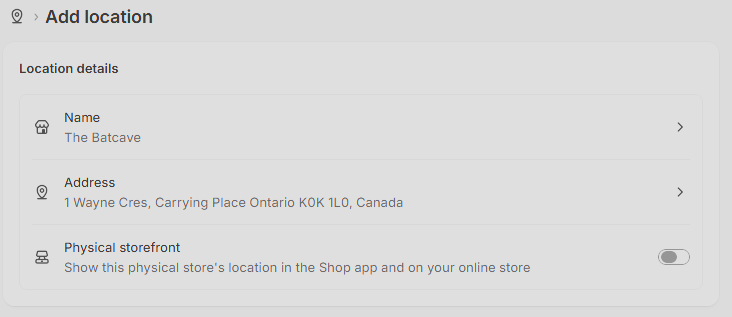
Step 1.2: Fill out the new store details
Give your new location a name, verify the address and decide whether you want Shopify to display a physical location for the store. Save your changes.
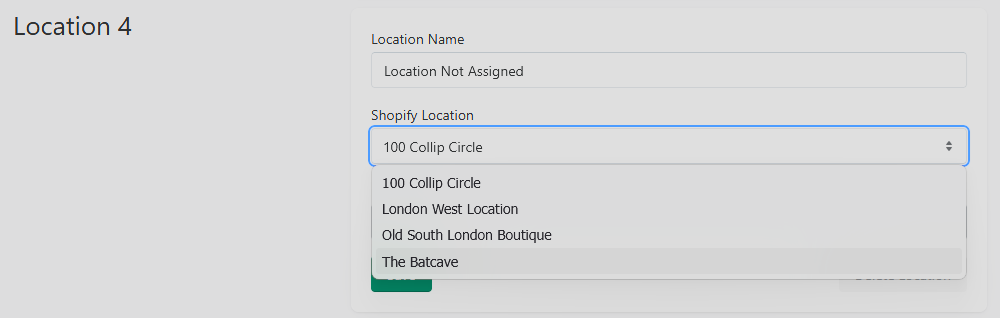
Step 2.1: Open the Manage Comics App and navigate to Settings > Locations
You will now see your newly created Shopify location available in the dropdown menu labelled "Shopify Location".
Step 2.2: Verify details
After selecting your Shopify Location, give the Location a name for Manage Comics and assign a background color. Save your changes.
Step 3.1: Test your new location
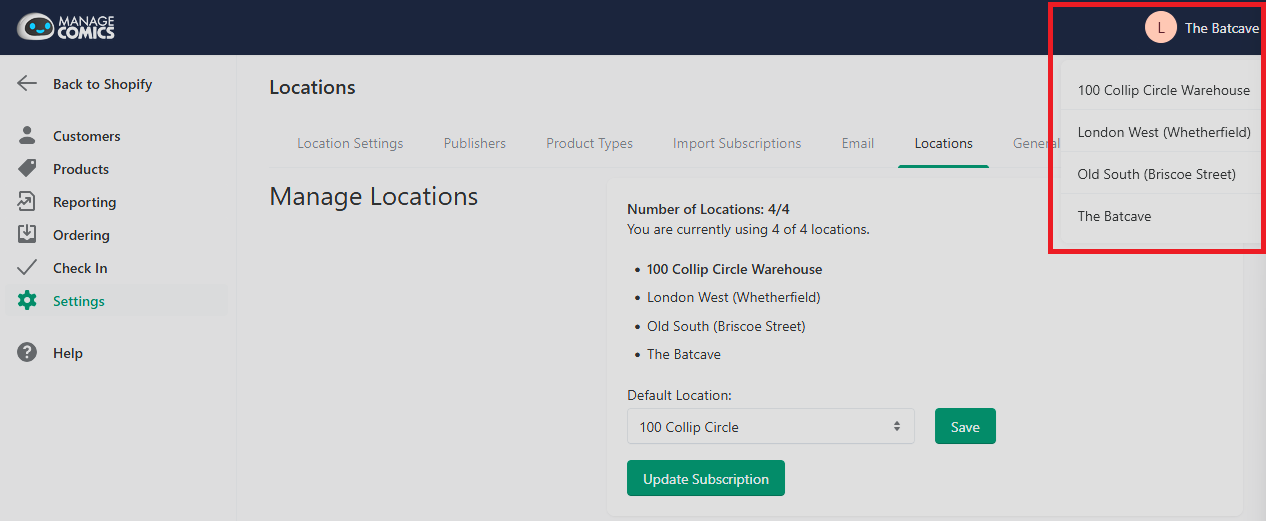
Refresh the page and in the dropdown at the top right of the window, you will see your new location.
Step 3.2: Modify new location settings
You can customize the rest of the settings for this new location and begin importing subscriptions or customers.
Removing Locations
If you need to delete a location, Manage Comics will move all customers to a new location.
Select Delete Location and designate from the dropdown menu which location you want to move that location's customers to.
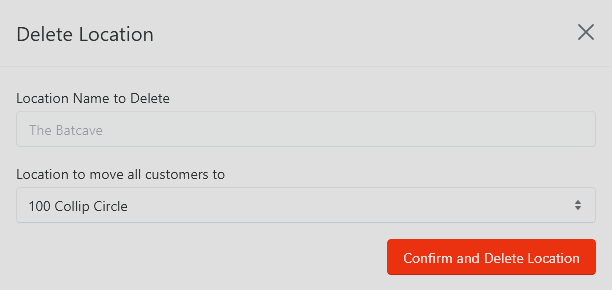
Note that you cannot delete your default location. If you need to remove your default location, first designate a new location as the default.
ORYX
Store Name
You can change the name of your Oryx store here. This will be reflected in all locations.
Adding Additional Locations
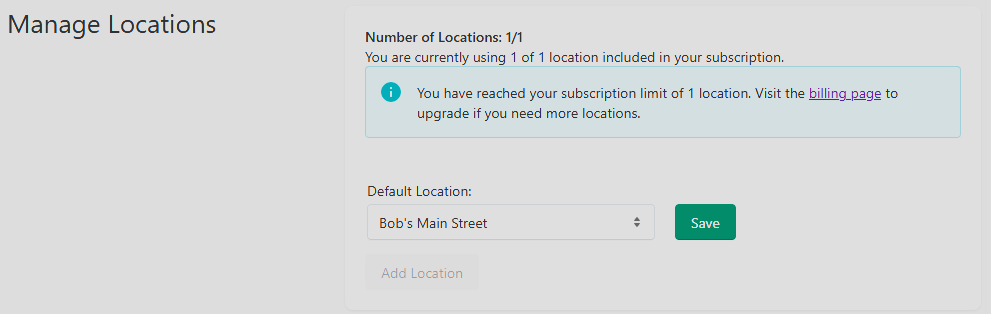
Step 1: Update your subscription
You can update your subscription to add additional locations under the Manage Locations section. If you are at the maximum locations included in your subscription, follow the link to the billing page to upgrade.
Step 2: Add additional Locations
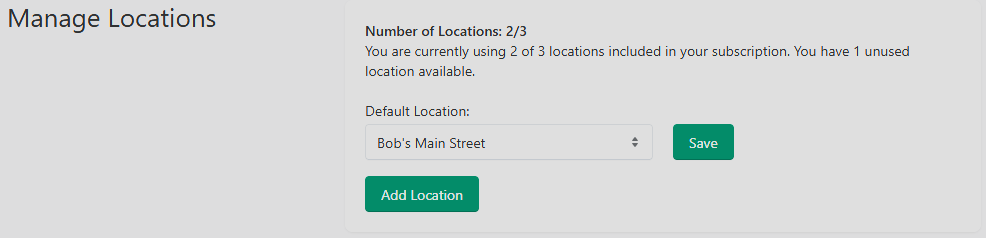
After upgrading your subscription, you can now click Add Location.
Step 3: Name and color
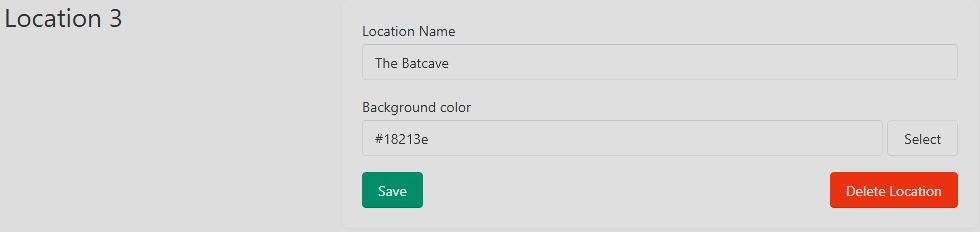
Give the new Location a name and assign a background color. Save your changes.
Step 4: Test your new location
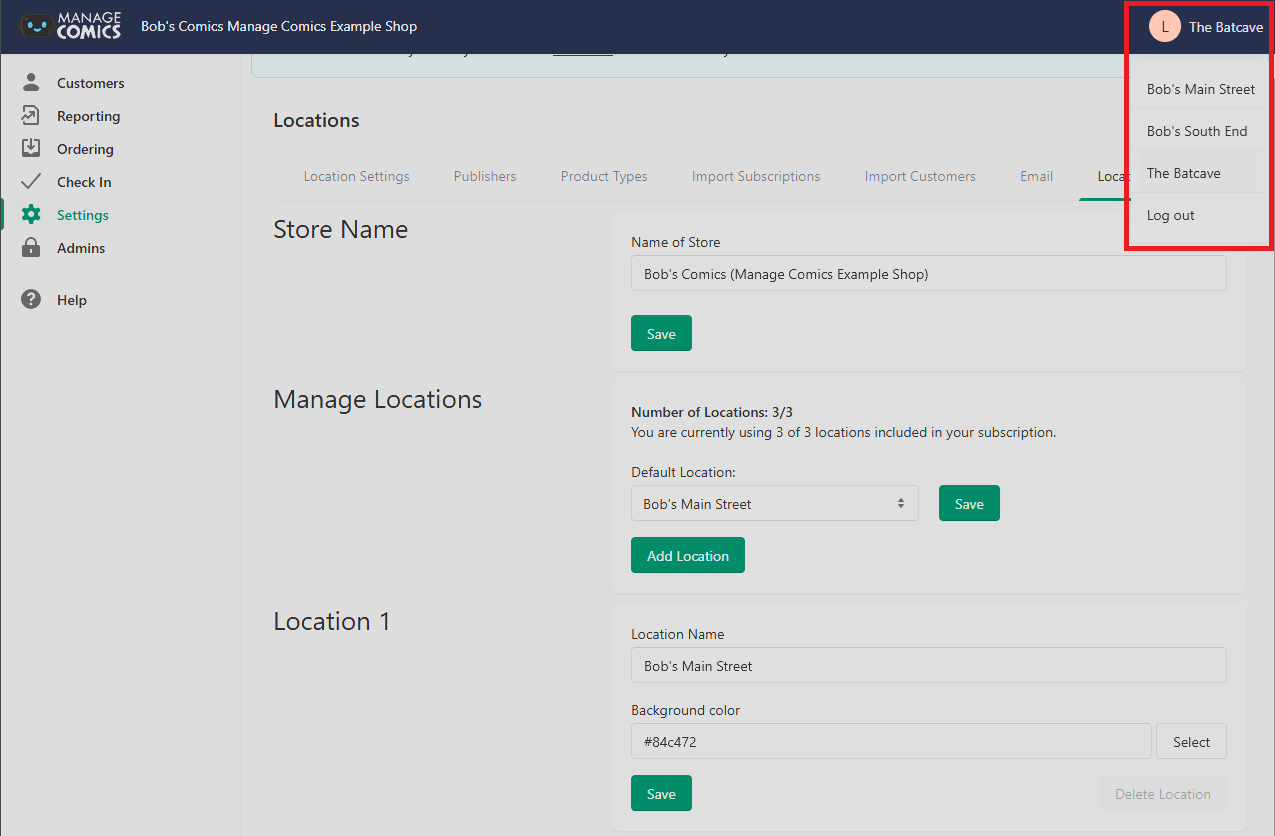
Refresh the page and in the dropdown at the top right of the window, you will see your new location.
Step 3.2: Modify new location settings
You can customize the rest of the settings for this new location and begin importing subscriptions or customers.
Removing Locations
Step 1: Deactivate and Delete Location in Oryx
If you need to delete a location, Manage Comics will move all customers to a new location.
Select Delete Location and designate from the dropdown menu which location you want to move that location's customers to.
Note that you cannot delete your default location. If you need to remove your default location, first designate a new location as the default.
Step 2: Remove deleted location from your subscription
Go to Update Subscription. Select the inactive location and click Remove Inactive Location. Confirm the removal to stop billing for that location.
Troubleshooting
Can't remove a location from subscription – Ensure the location is inactive first by deleting it in Store Settings
Error: "This location is currently active" – Deactivate the location in Store Settings before removing from subscription
Error: "One or more selected locations are active" – Check all selected locations and deactivate active ones first
New location not appearing – Verify the location details are correct and the location exists in Shopify
Billing still showing removed location – Subscription changes take effect on the next billing cycle