

Welcome to Manage Comics. This checklist gets you from zero to fully operational as quickly as possible. Follow the steps for your product in order — skipping around is tempting but usually creates small problems that are annoying to fix later.
If you haven't decided which product you're on yet, read Choosing Between Ordo and Oryx first.
Ordo Quickstart
1. Install the Manage Comics 2 Subscriptions app
Install the app from the Shopify App Store or directly via our install link. The install itself takes about 8 minutes — the full walkthrough is in How to Install Manage Comics 2 Subscriptions.
2. Add the Manage Comics App Embed
The App Embed is a small piece of code that lives on your Shopify theme and surfaces the customer-facing subscription interface. Enable it from Online Store → Themes → Customize → App Embeds → Manage Comics. See Add the Manage Comics App Embed for the full walkthrough.
3. Configure your store settings
Inside the Manage Comics app in your Shopify admin, go to Settings and configure:
Exchange rate (for shops outside the US)
ISBN settings
Terms of Service for subscribers
See Store Settings, Exchange, ISBN, Terms of Service.
4. Export your data and send it to us for cleaning
Export your customers and subscriptions from your old system — the export steps for Classic, ComicSuite, and RMH are in Importing into Manage Comics. Then email the files to help@managecomics.com with your shop name and your source system. We fix and clean the files so your import goes through the first time, and email them back ready to upload. Coming from another system? Export whatever customer and subscription data you can to CSV and we'll format it.
5. Import customers and subscriptions
Using your cleaned files: customers are imported through Shopify's standard customer import tool — Manage Comics reads from the Shopify customer record. Subscriptions are then imported via Apps → Manage Comics Subscriptions → Settings → Import Subscriptions. The full walkthrough is in Importing into Manage Comics.
6. Verify your subscription lists
Go to Customers → Customer Lists to confirm your imported subs look correct.
You're Ready!
With customers and subscriptions imported, you can start checking in weekly shipments and approving pre-orders. See Check In Weekly Shipment and Approve Pre-Orders to start.
Oryx Quickstart
1. Sign up and set your general settings
Go to oryx.managecomics.com/users/sign_up and create your account. Once you're in, go to Settings → Store Settings and enter:
Your shop name
Your primary store address
Default preferences (time zone, currency, etc.)
This is the foundation everything else builds on.
2. Set up supplier codes and distributors
Each publisher you order from has to be connected to a distributor (Diamond, Lunar, PRH, Universal, etc.). Without this, Oryx can't map your incoming invoice files to your customers' pulls.
Go to Settings → Products & Distributors. See Products & Distributors Settings for the full walkthrough.
3. Add additional locations (multi-location shops only)
Skip this step if you only have one location.
Each location in Oryx has its own inventory, pulls, and — optionally — its own customer rules. Multi-location setup is done once and should be done carefully. See Enabling and Managing Multi-Location.
4. Set per-location settings
For each location you've added, configure:
Which publishers that location orders from
Any customer rules specific to that location
Default shipping/pickup preferences
5. Set up email defaults
Go to Settings → Email and configure your "From" address and reply-to. Customer emails sent through Oryx will use these defaults. Make sure the From address is one you actually check.
6. Export your data and send it to us for cleaning
Bring your customer list in. The exact path depends on where you're coming from:
From Manage Comics Classic → see Import Subscribers from Classic to Oryx
From ComicSuite / RMH → see Importing into Manage Comics
From any other system → export whatever customer and subscription data you can to CSV and we'll format it
Then email the files to help@managecomics.com with your shop name and your source system. We fix and clean the files so your import goes through the first time, and email them back ready to upload.
7. Import customers and subscriptions
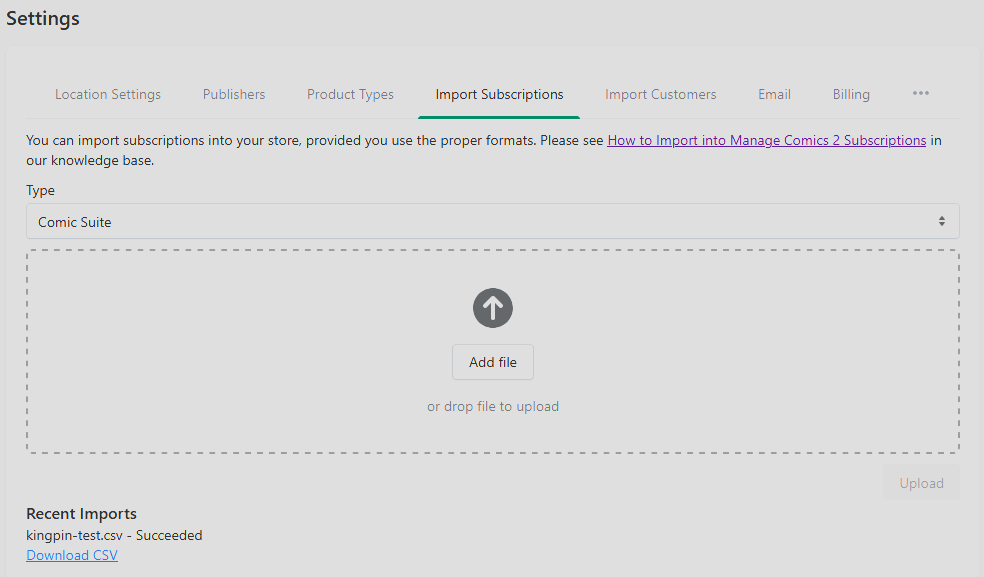
Using your cleaned files, import customers first through Settings → Import Customers, then subscriptions through Settings → Import Subscriptions. The order matters — subscriptions link to the customer records you just created by email address.
8. Create additional administrator accounts
Go to click Admins from the left navigation menu and add a login for each staff member who will use Oryx. Shared logins are a bad idea — they make your activity log useless and create a password problem every time a staff member leaves.
You're Ready!
With settings, customers, and subscriptions in place, you can check in your first shipment. Start with Checking In New Shipments (weekly workflow) or Approve Pre-Orders (daily workflow).