

There's no separate "single-product check-in" workflow — adding one item is done inside the regular check-in flow with the Find additional Items button. This article covers when and how to use it.
When to Use Find Additional Items
A single late or replacement copy from the distributor that wasn't on the invoice you're processing.
A one-off variant that wasn't on any invoice.
A correction for a missed item from a prior check-in that you want to add to this week's pull.
For full weekly invoices, use Check In Weekly Shipment. For mid-week shipments with no invoice file but multiple items, use New Mid-Week Shipment.
Steps
Start a check-in as normal — Check-In → Start Over if needed, then upload (or skip) an invoice file.
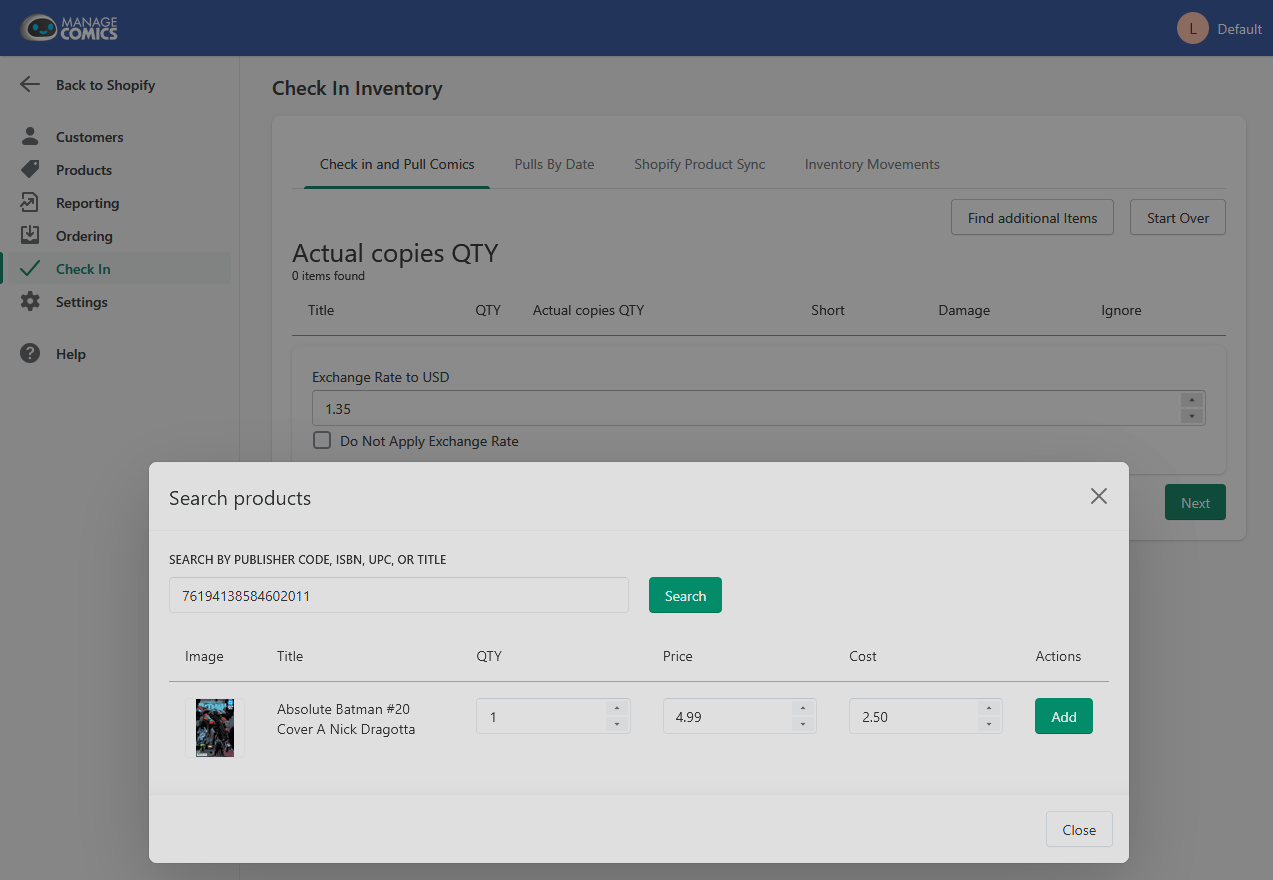
On the items review screen, click Find additional Items.
Search by title or scan the barcode.
Confirm the matching item.
Enter quantity and adjust price if needed.
The item joins the current check-in session and is allocated to subscribers (if any) when you click Next to advance to the subscriber allocation screen.
When you check in a single product this way, items are not pulled for subscribers automatically. You have to check the "Pull" checkbox for each item you want pulled. Miss this step and the product enters inventory but never lands on a subscriber's order.
Cautions
One-offs only. Don't use Find additional Items as a substitute for uploading a real invoice. You'll lose the cost and FOC date data that comes from the distributor file, and reconciliation gets harder.
Ordo tag consistency. If your New Releases collection depends on a tag, add it during the import step at the end of check-in — otherwise the item won't appear in the New Releases collection on your storefront.
Related
Check In Weekly Shipment — the full weekly workflow.
New Mid-Week Shipment — multiple items, no invoice file.
Add an Item to an Order — adding an existing shelf item to a specific customer.