

In order to use Tax Exemptions (in regions where Shopify Tax is not available), you'll need to create a manual collection and assign items to that collection. - See Shopify Tax Overrides and Exemptions.
Download the Flow here: Assign Products to Tax Exempt Collection
We start when a product is created, check that the Product product type is equal to Graphic Novels, add that to your collection (you will have to edit this part).
If no type is found, send an email to the store to let them know that a product is missing a product type.
Before you start
Set up a tax-exempt collection in Settings → Taxes in Shopify.
Decide on the rule for which products should be tax-exempt, for example "product type = Apparel" or "vendor = XYZ".
Steps to Setting up the Flow
Choose your manual collection (see Shopify: Creating a Manual Collection). I named mine "HST Exempt"
Next we'll replace the email and the URL of the store with the correct info.
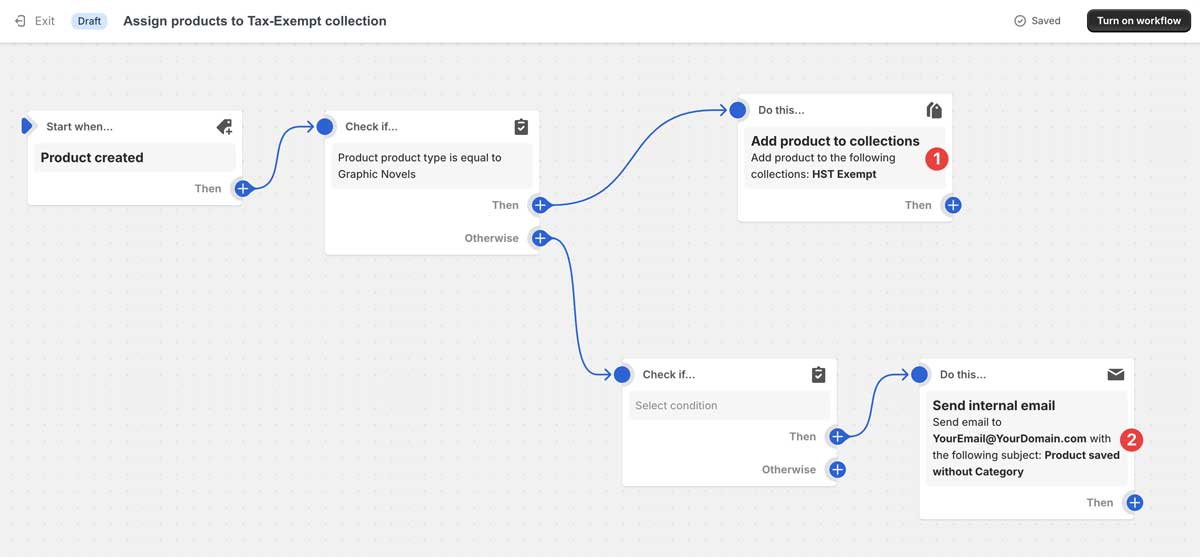
Enter the email you want notifications to go to in the Email Address field
Update the URL in the with the URL of your store admin.
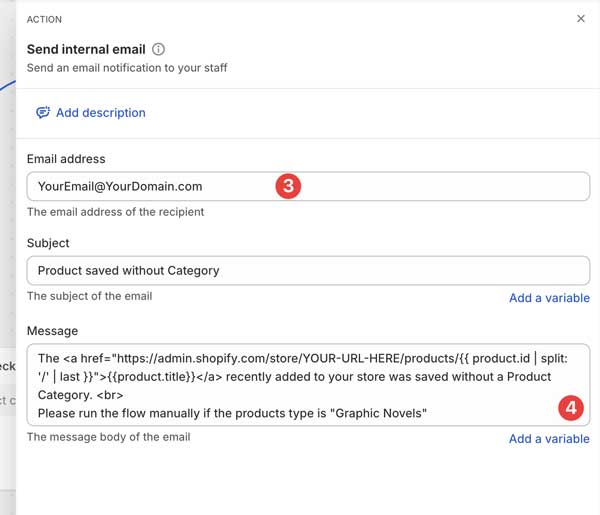
Find your store URL in the address bar of any page in the Shopify Admin.

Turn on the workflow (upper right hand corner)
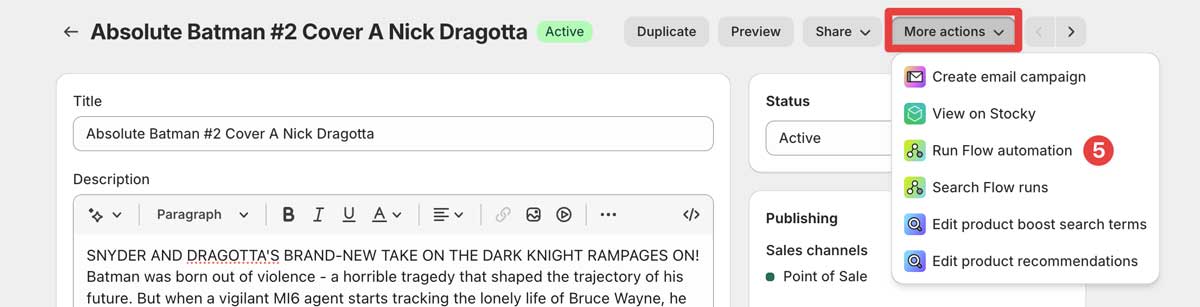
Once you've configured and started the flow, you can test it on any product in your store.
from a product, select More actions.
Select the "Assign products to Tax-Exempt Collection" workflow
Click the Run Workflow button
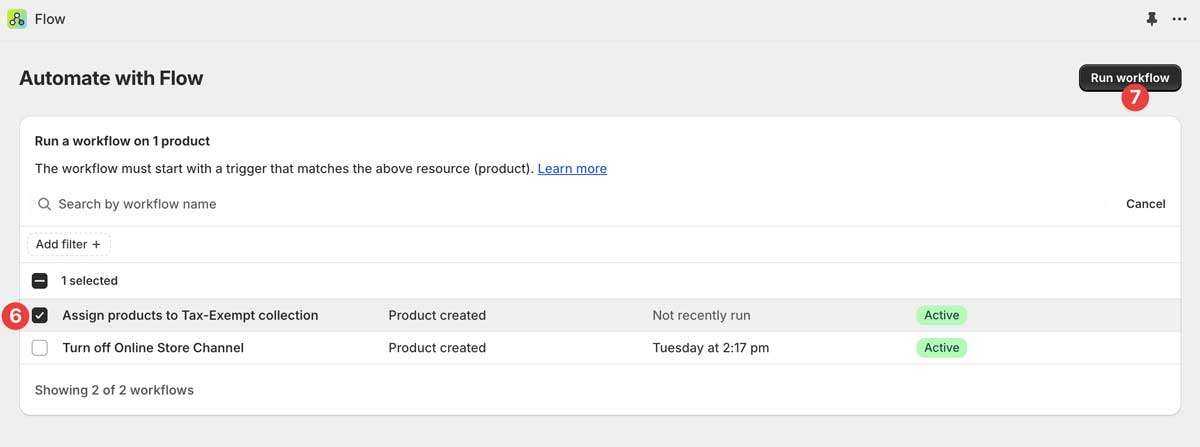
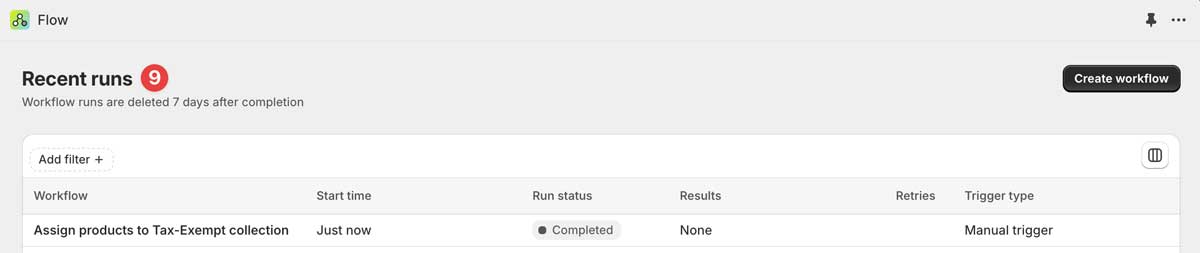
View the Results in Flow
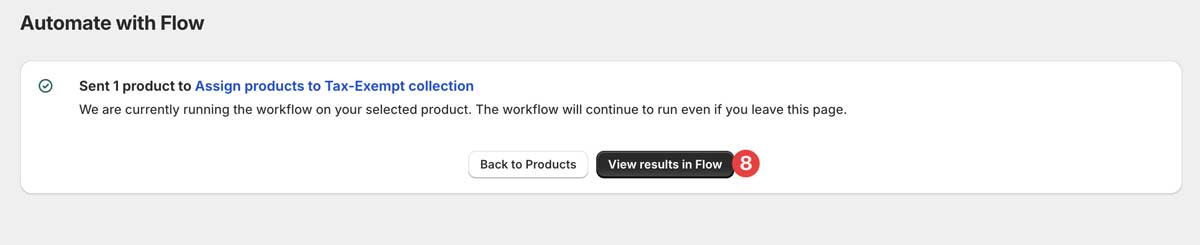
Flow shows you what it did recently, and if it did something, it will let you know (since this was a comic, the results were "none".
Things to keep in mind
Tax rules vary by jurisdiction. The Flow only enforces the rule you set. Talk to your accountant about which products should be tax-exempt.
Shopify Flow is Shopify-side only. If your tax-exempt rule depends on Manage Comics data, such as subscription status, this Flow is not the right tool.